Budding Vegetables & Gardening Zen

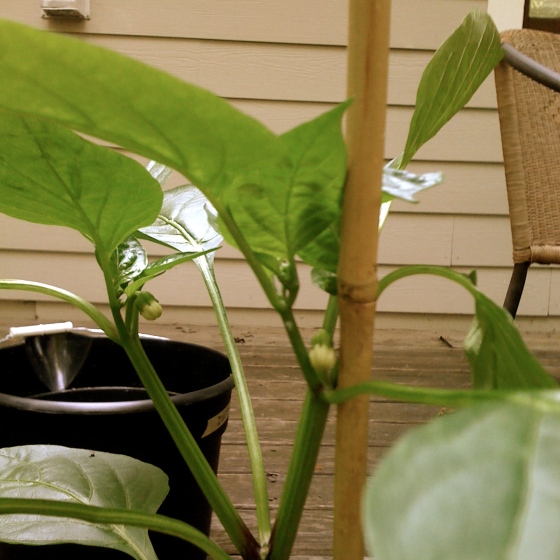
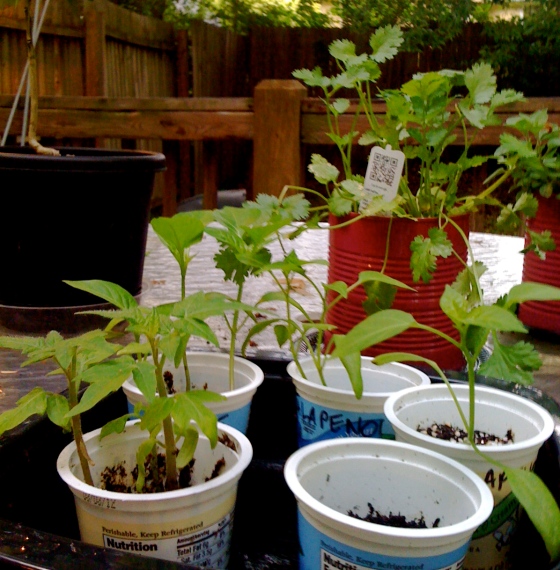
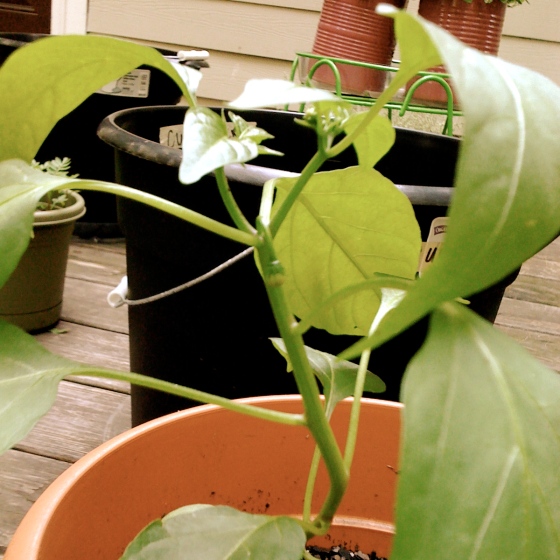
You can only read so many books and web articles about vegetable gardening before you just have to sack up and do whatever is that you have been reading about. By reading and reading and reading, we ended up putting off transplanting for a really long time. Luckily, it hasn’t done any lasting harm to our plants. Check out the buds on the tomato, jalapeno, and bell pepper plants. I am woman! I make vegetable!

What’s that you say? You can’t see the buds? Well, they’re really small, OK?

Annnnnnyway, some form of procrastination leaked into the rest of our original planting schedule and temporarily poisoned our will to plant. I don’t know why we kept putting it off, but eventually we were reading packets that said to plant “2 to 4 weeks after temps reach 65 degrees” or some degree indicative of early springtime. It is so not early springtime anymore. But who cares, I say! I laugh in the face of seed packets! I am woman! I make–you get the point.

So last night when I got home from work, feeling a little tired, a little discouraged, a little envious of other organizations’ websites, whatever, I decided June 12 seemed like a perfect time to plant my early spring vegetables. You know, I just went for it. Who cares if it’s not radish season anymore according to some packet? It’s always radish season in my heart. So I got Jordan to drill some holes in some buckets, and we planted. Radishes. Lettuce. Zucchini. Cucumbers. Carrots. Just like that.

And I felt connected to Ceres, goddess of grain and harvest, as predicted in my cost benefit analysis of vegetable gardening. And I went inside feeling calm–respite gleaned by burying treasures and digging in dirt.
A Few Updates from April & May

Ok, I know we haven’t posted in forever, but we are making lots of progress. It’s just now I have less time to write about the plants because I am too busy looking at them from inside my kitchen. Nevertheless, here are a few highlights from the past month & some:

  • I have officially turned Jordan into a lean, mean, watering-plant machine. He can water plants all by himself and without reminders! Go Jordan, you deserve chocolate chip cookies for your effort!
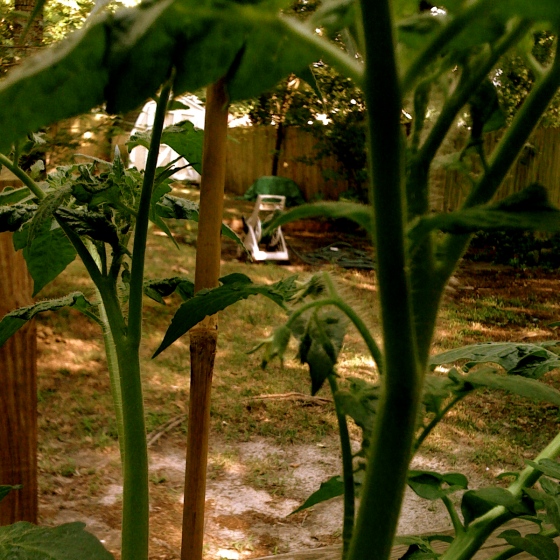
  • Our tomato plant grows like a foot a day or something. I like to peek out the kitchen window where it’s safe from bugs and heat and to make sure there aren’t any squirrels threatening our plants and seriously, every time I look, the tomato plant is taller!
  • Even though the seed packet said we were supposed start jalapeno seeds indoors, we decided to pull a Hail Mary and scatter some more seeds in our jalapeno pot. The squirrels attacked the poor jalapeno constantly for the first few weeks of it’s life outdoors and we’re hoping new plants will survive and thrive despite our breaking the rules listed on the back of the seed packet.

Now for the bad and shameful news: we are so behind in our planting. No lettuce started, no radishes started (missed that boat), also nothing else. Forget this planning stuff, we’re in panic mode and we’re just going to throw some seeds in some pots and see what happens.

We are also growing herbs but not nearly as many as I wish. I think if we started a garden in the ground instead of in pots,  I would make it a giant herb garden! We have oregano, basil, thyme, spearmint, lavender, and lemon verbena to start. I think my original wish list included garlic, chives, anise, mustard, elderflower, dill, french tarragon, borage, caraway, coriander, lemon grass, jasmine, sweet bay, sage, peppermint, sweet marjoram, nasturtium, parsley, rosemary, and scented geranium. And that’s only a partial list…

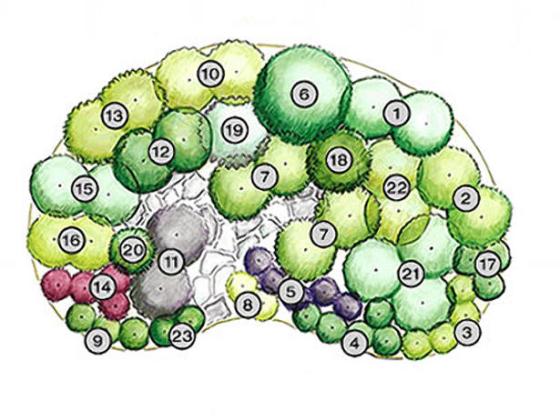
One of these days, I’ll have something like this, give or take a few herbs:

Landscape Plan: Herb Garden from HGTV.com

1. Vetiver grass (Vetiveria zizanioides)
2. Dwarf Mexican sage (Salvia leucantha ‘Santa Barbara’)
3. Curly parsley (Petroselinum crispum)
4. Periwinkle (Catharanthus roseus), a lavender variety
5. Purple basil (Ocimum basilicum ‘Purple Osmin’)
6. Anise sage (Salvia guaranitica)
7. Purple coneflower (Echinacea purpurea)
8. Golden oregano (Origanum vulgare ‘Aureum’)
9. Thread-leaf tickseed (Coreopsis ‘Moonbeam’)
10. Purple parsnip (Angelica gigas)
11. Purple sage (Salvia officinalis ‘Purpurascens’)
12. Bee balm (Monarda didyma ‘Cerise Queen’ or ‘Blue Stocking’)
13. Dwarf Joe-pye weed (Eupatorium purpureum ‘Galaxy’)
14. Purple basil (Ocimum basilicum ‘Red Rubin’)
15. Goldenrod (Solidago ‘Fireworks’)
16. Variegated lemon balm (Melissa officinalis ‘Aurea’)
17. English thyme (Thymus vulgaris)
18. Hardy rosemary (Rosmarinus officinalis ‘Arp’)
19. Cardoon (Cynara cardunculus)
20. Lemon grass (Cymbopogon citratus)
21. Tricolored sage (Salvia officinalis ‘Tricolor’)
22. Korean mint, Mexican mint (Agastache urticifolia ‘Honey Bee Blue’)
23. Toothache plant (Spilanthes oleracea)

Here’s to dreaming!

Inexpensive & Quick Front Porch Makeover

Recently, on a trip to the hardware store to purchase supplies for our seedlings, we got distracted by the pretty flowers. This happens to everyone, right? Because we rent, we didn’t really want to put any money into landscaping. But one can only look at dirt and empty flower pots and our next door neighbors’ gardens for so long before breaking down. We may have been saving a money, but the front of our house was an eyesore. Curb Appeal: The Block, where are you?

Fed up with ugliness and desperate to fill the empty, bolted down, blue pots on the front stoop, we ran up and down the garden store aisles saying, “I want this one, and this one, and this one, and this one…” before realizing we have shade and all the flowers we had chosen need sun. After putting the sun-loving plants back where they belong, we chose standard shade plants to spruce up our front porch.

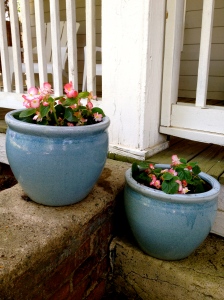
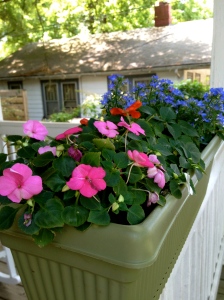
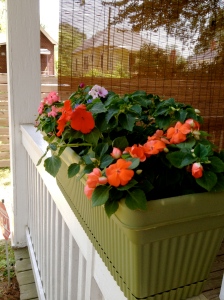
We planted light pink begonias in the three matching blue pots and placed them on the front steps to create a little asymmetry. We also planted multicolored impatiens with periwinkle blue lobelia (which is actually a sun plant but supposedly does well in shade too) in light green “window boxes” placed on the front porch railing. I think we spent less than $50 on all the flowers, containers, & potting soil.

We took a hose to the entire porch to wash off the winter grime and cleaned the rocking chairs and adirondack chairs that were covered in a light green haze of pollen. With a little money, an afternoon, and some TLC, our front porch is now happy and homey.

All we need now are some hanging plants, wind chimes, AND SOMETHING GREEN IN THE FRONT YARD, and we’ll be all set.

BEFORE:
Dirty porch, empty pots, sad-looking house, front yard of dirt and weeds.

AFTER:
Pretty, clean porch! (Front yard of dirt and weeds not pictured.)
         

Blog Absence Explained; Seedling Progress

Charlotte is something like the second or third worst city in the United States for seasonal allergies and I happen to be the second or third most allergic person in Charlotte. Not a very happy situation. Since we had such a warm winter, the pollen started very early (late February) and we still have brown strands of irritants covering our front yard.

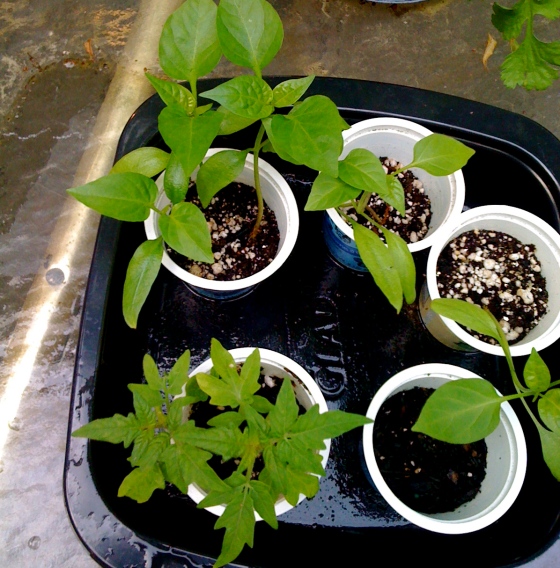
The bad news is that I have fallen off the wagon of tracking our seedlings’ progress and planting new seeds due to uncontrollable sniffling, sneezing, and general allergy induced sickness. The good news is we hardened off our first batch of seedlings and they are thriving on our back deck! We’ve also had a lot of rain and haven’t really needed to water our plants. Nature is finally doing something in our favor.

I believe it might be time to say goodbye to the weaker plants and transplant the stronger ones to larger pots. Today would be the perfect day if we hadn’t wasted the entire morning watching Yard Crashers and wishing Ahmed Hassan would come make our backyard an oasis instead of the jungle that currently plays host to the boldest squirrels that ever lived, several bird families, fearless neighborhood cats, and raccoons and possums who wake us up in the middle of the night by walking around on our deck. But that is a story for another day.

Off to figure out container size and whether or not I can use companion planting in said containers. This container gardening stuff is pretty complicated!

How to Water a Thirsty Piano

Jordan is in charge of compost and probably will have a large role in plant watering once we get our plants established. I have been doing most of the seedling nurturing, as is expected of my gender, while Jordan lazes around. Just kidding. He serenades me and our plants with his perennial piano playing as he prepares for his recital, which happens to be today. Have I seen a movie where classical music is playing in a greenhouse? Maybe that’s why we are having so much success with our seedlings.

In addition to practicing the piano, Jordan has also been practicing his watering skills on the piano. No, he is not watering the piano with a watering can, but he is, sort of. Let me explain. Our piano is located on an outside wall in an old house so the temperature and humidity is always fluctuating around and inside the piano. This causes the piano to work its way out of tune more often than it should. So, unbeknownst to me, Jordan got a humidifier/dehumidifier for the piano. Did you know such a thing existed? Me either.

Somewhere inside our old Steinway is a water reservoir that replaces moisture inside the piano when things get too dry and a dehumidifier that will magically activate itself when things get too moist. I guess it’s kind of like a self-watering planter in a way. Side note: I think self-watering planters are the coolest things ever. Likewise, Jordan thinks his piano watering system is quite dandy and will tell you all about it if you want to listen.

I think Jordan has watered his piano 4 times in the past couple months. Hopefully he will be as responsive to our plants’ needs as he is to the blinking light that indicates that the piano is thirsty.

Look at Jordan practicing his watering skills. So patient! So happy!

Here he is cleaning up the water that spilled out of the watering tube. Lesson learned: don’t overwater your piano or your plants.

Vegetable Growing Tracking Chart

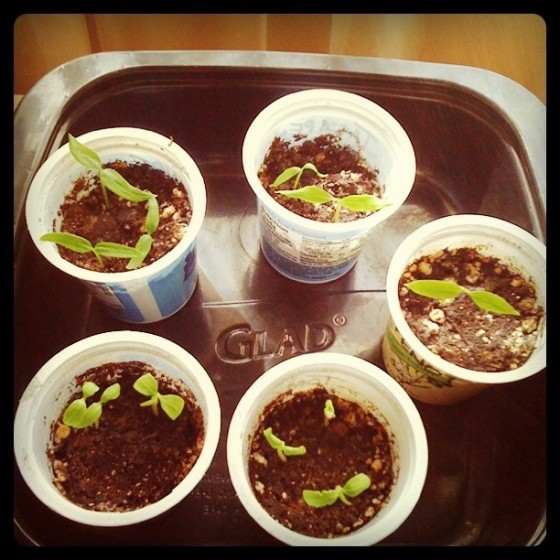
Having planted our first set of seeds two weeks ago, we have seen lots of growth from all three plants we started. I’m feeling a bit like Mother Earth right now when I see the little shoots folded over and busting out of the soil. We were just minding our own business last weekend and all of a sudden the seeds just popped up and started to exist, just like that! One of the tomato seedlings in each of the two cups at the bottom of the picture have already started to grow “true leaves.” Proud mama!

I think there are only two seeds that haven’t emerged out of the 15 we planted so our success rate so far is 86%. That’s a B in seed starting. Not too shabby for beginners. Holla.

I’ve also started tracking the process in an excel spreadsheet because I need all the information from the seed packets in one place. I can’t just expect to remember what I’m supposed to be doing for each individual plant on my own at this point. So I’ve divided the process into phases that seem to make sense.

Phase one is Planting and Germination. The planting columns include information about soil depth and planting date and a place to record when we actually planted the seeds. The germination section includes when to expect green shoots busting out of the soil, how many days it actually took to happen, and the actual date for future reference. So far, making this tracking chart has been one of the more fun tasks for me. That’s kind of sad. Moving on!

The next logical phase is Thinning and Transplanting. I’ve read conflicting accounts about thinning and transplanting and I have to say I’m a bit confused about this part of the process. I don’t think any of the seedlings are ready to be thinned or transplanted so I’m just not going to worry about it for now.

I think phase 3 will be Care which will include watering, fertilizing, and mulching rules. It might also need to include ways to kill bugs or a record of what went wrong if all of our plants die because they are attacked by evil bugs or diseases. Each plant deserves individualized attention in order for it to succeed in producing its fruit.

The next phase will be Harvest and the phase after that will probably be Preparing for Winter.

I bet there is a template somewhere out in gardening blog world and I need not have spent my entire morning building this spreadsheet. But what’s done is done! Does anyone out there have a notebook or spreadsheet filled with notes in order to track growth and organize information?

Seed Starting in Zone 7b

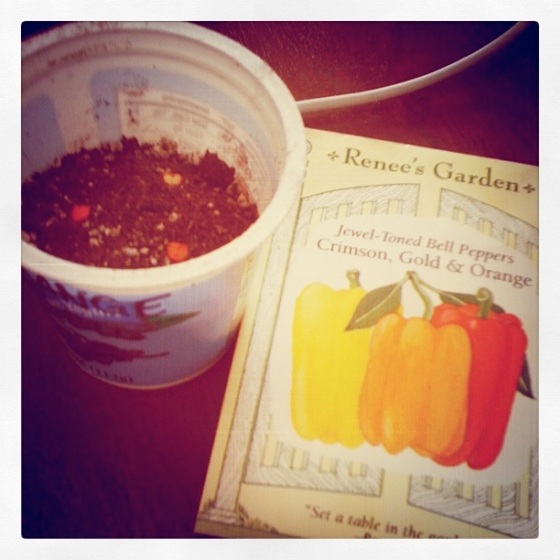
Jordan and I finally did another gardening activity together: we started some seeds! It was time to start growing the first of our babies–bell peppers, tomatoes, and jalapenos. (I almost forgot about the jalapenos because they weren’t included in my Sprout Robot schedule! What kind of Robot are you??)

First, we read the back of the seed packets just to be sure there wasn’t anything special, like seed scarification or soaking, that needed to happen. Jordan also read the starting soil bag and later told me to “water gently.” (Success! He’s learning on his own!)

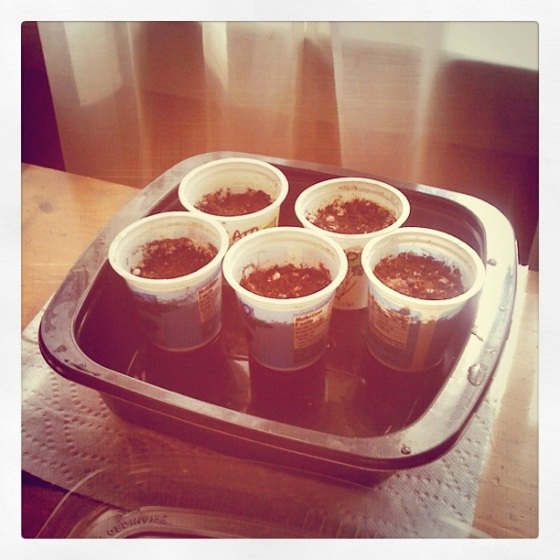
Next, Jordan filled our sterilized Trader Joe’s yogurt cups with the starting soil and I placed three seeds into each container. We decided to start an Orange Bell Pepper plant this week and start a Red & Yellow Bell Pepper in the next two to four weeks so our potential yield will be staggered. We like bell peppers, but not so much that we want three varieties producing at the same time.

We also planted two cups of jalapeno and tomato seeds. Since we’ll only transplant the healthiest of the seedlings, we thought we might want to try two jalapeno plants and two tomatoes, just in case. I’m actually starting to wonder if we should start another tomato; growing up with an Italian home chef for a mama taught me one can never have enough tomatoes.

After we pushed the seeds into the appropriate depth in the starting soil, we “watered gently” and placed the cups in a plastic container and placed the container in the sunniest spot in our house. Supposedly we should have a fancy grow light for our seeds but we don’t. I’m sure people started seeds indoors before grow lights were invented. We’re just kickin’ it old school.

Are we naive to think we can start seeds indoors without a ton of constant light? Will our 20 minutes of seed planting be in vain? Oh, the fears of seed starting!

Global Warming/Climate Change Equals More Bugs

Listening to public radio is so interesting. I’m always learning something new. We used to listen to NPR on the way to school every morning growing up so now I think of it as news masquerading as story time. I don’t know how many times a day I start a story with, “I was listening to the radio and I heard…”

Well, let me tell you a story about a story I heard. If you’ve been following along, you know I hate bugs. According to the “Plant Doctor” Melinda Myers, who was on Charlotte Talks recently, our unnaturally warm winter is going to result in more bugs bothering us than normal. Stupid global warming/climate change!

I didn’t hear the whole conversation so I don’t know exactly why there would be more bugs than usual, but I’m assuming they just have more time to wake up and multiply. Having never gardened before, I don’t know what’s normal for populations of bugs, but when she advised us to “grab the bugs early before they multiply into the hundreds,” I have to admit I got more than just a little freaked out. By the way, she really meant “grab” the bugs. Like, with your hands.

An example of my psychological problem with bugs: just a minute ago, I moved my foot and some fuzz from my slippers ended up on my lap. I almost jumped out of my skin thinking it was a bug! A fuzzy red bug, spawned from my shedding slippers. I need an intervention.

With “hundreds” of bugs to deal with this summer (Sacre Bleu! Invaders!) a question remains: will I be able to conquer my fear and save my darling plants?

Who will save me?

Euh, Stinky: Troubleshooting Compost Problems

Jordan is master of compost. He is the one who delivers our food scraps to the compost bin and is supposed to make sure all is well in compost heaven. Well, Houston, we have a problem.

The most dreaded of compost problems for me is stinky compost. And we definitely have stinky compost. I remember reading about troubleshooting compost problems and I decided I should make like Nancy Drew and investigate this mystery. So I asked myself these questions to determine the solution to the stinky problem:

Q: Do you have stinky compost?
A: Yes. Stinkiness confirmed.

Q: What have you been putting in your compost bin?
A: Only food scraps. And no oils, I swear!

Q: Have you been following the ratio from your compost recipe of 3:1 browns (carbon-rich) to greens (nitrogen-rich)?
A: No! This must be part of the problem. Master composter, Jordan has been adding our food scraps to the bin every week but hasn’t been adding the leaves and paper scraps. Eh.

Q: How wet is the mix, like a wrung out sponge?
A: Wetter than a rung out sponge, it’s been raining. At least the holes on the side of the bin are working.

So it seems like our problems are not enough dry browns and too much water and perhaps not enough air. I think it might be time to stop adding greens to the pile and let it cook a while. But what do we do with our kitchen scraps in the meantime? Start another bin? I’m not sure I’ll be able to convince Jordan to bite holes in another trash can…